
- China Caterpillar Hydraulic Final Drive Motor Supplier
- Caterpillar Hydraulic Final Drive Motor John Deere Hydraulic Finaldrive Motor Bobcat Final Drive And Travel Motor

Home>Products>Caterpillar Hydraulic Final Drive Motor>Caterpillar 268B 1-Spd Reman Hydraulic Final Drive Motor
Caterpillar 268B 1-Spd MODELS
Need a CAD or 3D Model?
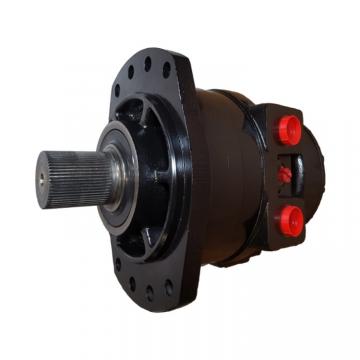
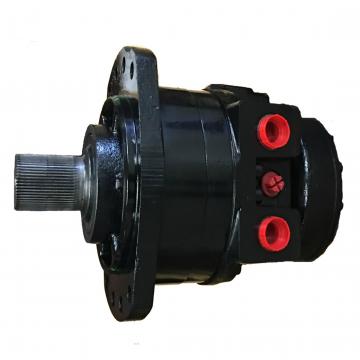
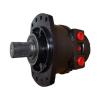
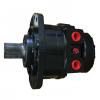
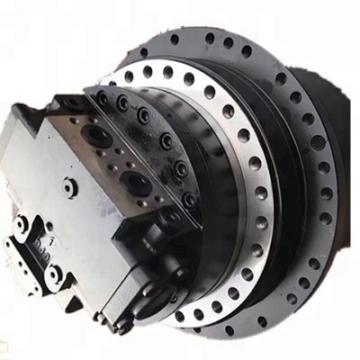
Caterpillar 268B 1-Spd Reman Hydraulic Final Drive Motor
Caterpillar Hydraulic Final Drive Motor
Caterpillar 268B 1-Spd Bearing SPECIFICATIONS
Can't find 2 Bolt Pillow Block Housing Type what you're looking for Caterpillar 268B 1-Spd Reman Hydraulic Final Drive Motor ? Our expert Caterpillar Hydraulic Final Drive Motor Representatives Baldor-Dodge Brand be TYPE C Shaft Attachment Type in contact with China Caterpillar Hydraulic Final Drive Motor Supplier you shortly!
- Caterpillar
268B 1-Spd
- Baldor-Dodge
- 2 Bolt Pillow Block
- TYPE C
- SPECIAL DUTY
- 207 Series
- Concentric Clamp Col
- Grease Seal (Taper)
- Steel
China Caterpillar Hydraulic Final Drive Motor SupplierChina
-
 China Caterpillar Hydraulic Final Drive Motor Supplier2020-07-10 09:46:19
Welcome to my shop! Glad to serve you! Please send your question!
China Caterpillar Hydraulic Final Drive Motor Supplier2020-07-10 09:46:19
Welcome to my shop! Glad to serve you! Please send your question!
Caterpillar Hydraulic Final Drive Motor Product Description
- Baldor-Dodge
- 2 Bolt Pillow Block
- TYPE C
- SPECIAL DUTY
- 207 Series
- Concentric Clamp Col
- Grease Seal (Taper)
- Steel
- Tapered
- Mobilgrease XHP222
Caterpillar 268B 1-Spd Caterpillar Hydraulic Final Drive Motor Cross References
| No. | Brand | R | Z | D | m | C | a | E | L |
| 151-9686 | Caterpillar | - | - | - | - | - | - | - | - |
| 262B 2-Spd | Caterpillar | - | - | - | - | - | - | - | - |
| 227-6104 | Caterpillar | - | - | - | - | - | - | - | - |
| 216 1-spd | Caterpillar | - | - | - | - | 12.8 kN | - | - | - |
| 148-4696 | Caterpillar | - | - | - | - | - | - | - | - |
| 236B 2-spd | Caterpillar | - | - | - | - | - | - | - | - |
| 201-7117 | Caterpillar | - | - | - | - | 43.55 kN | - | - | 140 mm |
| 191-1384 | Caterpillar | - | - | - | - | - | - | - | 68 mm |
| 114-1452 | Caterpillar | - | - | - | - | - | - | - | - |
| 136-2808 | Caterpillar | - | - | 68 mm | - | - | - | - | - |
| 169-5543 | Caterpillar | - | 59.1 mm | - | - | - | - | - | - |
| 148-4567 | Caterpillar | - | - | - | - | - | - | - | - |
| 262B 1-Spd | Caterpillar | - | - | - | - | - | 14.71 mm | - | - |
| 236B3 1-spd | Caterpillar | - | - | - | - | - | - | - | 224 mm |
| 114-1527 | Caterpillar | - | - | - | - | 43.55 kN | - | - | - |
| 208-0647 | Caterpillar | - | - | 160 mm | - | - | - | - | - |
| 246B 2-Spd | Caterpillar | - | - | - | - | - | - | - | - |
| 220-8172 | Caterpillar | - | 16.5 mm | - | - | - | - | - | 130 mm |
| 220-8152 | Caterpillar | - | - | - | - | - | - | 54 mm | - |
| 242b3 1-spd | Caterpillar | - | - | 80 mm | 8 mm | 25 mm | - | - | - |
| 136-2935 | Caterpillar | - | - | - | - | - | - | - | 130 mm |
| 099-6480 | Caterpillar | - | - | - | - | - | - | - | - |
| 236B3 2-spd | Caterpillar | - | - | - | - | 83.2 kN | - | - | - |
| 081-4456 | Caterpillar | - | - | - | - | - | - | - | - |
| 247B | Caterpillar | - | - | - | - | 25.7 kN | - | - | 92 mm |
| 242-1154 | Caterpillar | - | - | - | - | - | - | - | - |
| 10R-3337 | Caterpillar | - | - | - | - | - | - | 18 mm | - |
| 133-3658 | Caterpillar | - | - | - | - | - | - | - | - |
| 199-4578 | Caterpillar | - | 77.8 mm | - | - | - | - | - | 130 mm |
| Caterpillar 191-3247 Hydraulic Final Drive Motor | Housing Material:Cast Iron; Housing Type:2 Bolt Pillow Block; Bearing Locking Device:Tapered Adapter Slee; Retainer Type:Std Retainer; Bearing Series:214 Series; UPC:782476307981; Ball Bearing Housing Series:214 Series; Bearing Outer Ring Material:Steel; Retainer Material:Nylon; Brand:Baldor-Dodge; |
| Caterpillar 150-1011 Hydraulic Final Drive Motor | Housing Type:4 Bolt Flange; Manufacturing Plant Location:Rogersville, TN; Anti-Rotation Pin:Yes; Max Bearing Speed:4500 rpm; Ring Size:Standard; Bearing Bore Shape:Round; Housing Material:Polymer; Shaft Attachment (2):D-Lock; Bearing Inner Ring Material:Steel; Grease Type:Mobilgrease FM222; |
| Caterpillar 10R-6131 Reman Hydraulic Final Drive Motor | D:35 mm; da min:14 mm; da max:17.7 mm; Min operating temperature, Tmin:-20 °C; Nref:21,000 rpm; Radial clearance class:CN; Max operating temperature, Tmax:120 °C; Fatigue limit load, Cu:0.22 kN; Mass:0.06 kg; ra max:0.6 mm; |
| Caterpillar 081-4043 Reman Hydraulic Final Drive Motor | Recommended tightening torque for set screw:8 Nm; L:120 mm; A1:32 mm; H2:107 mm; B:41.2 mm; Dz:95 mm; Designation of closed end cover:SCC209; L1:29 mm; G:R1/8"; C0:20.8 kN; |
| Caterpillar 247B Reman Hydraulic Final Drive Motor | Designation of housing:FLE207-; A2:49.4 mm; d:35 mm; Weight:1.2 kg; G:R1/8"; A:33.7 mm; L:92 mm; C:25.7 kN; Recommended tightening torque for set screw:11.5 Nm; d1:51.1 mm; |
| Caterpillar 114-1437 Hydraulic Final Drive Motor | N:12mm; J:90 mm; A2:29.7 mm; S:14.3 mm; s1:17 mm; Designation of housing:FC205N-; B:34 mm; Designation of bearing:UC205-16G2; A4:21 mm; e:10 mm; |
| Caterpillar 109-3261 Reman Hydraulic Final Drive Motor | Nlim (grease):7,000 rpm; Dw:2 mm; Mass:0.25 kg; Lw:11.8 mm; Characteristic cage frequency, FTF:0.46 Hz; m:PT1/8; R:500 mm; d1:18 mm; Brand:NTN; B1:58 mm; |
| Caterpillar 114-1452 Hydraulic Final Drive Motor | Category:Bearings; d1:64.5 mm; Nlim (grease):6,500 rpm; Da max:92 mm; Minimum Buy Quantity:N/A; Manufacturer Name:NTN; d:45 mm; da max:57 mm; Brand:NTN; F:58.5 mm; |
Caterpillar 268B 1-Spd Reman Hydraulic Final Drive Motor Video
Caterpillar 268B 1-Spd INTERCHANGE
Caterpillar Hydraulic Final Drive Motor Part series 268B 1-Spd is a potential replacement for these common bearing part numbers:
268B 1-Spd
268B 1-Spd
268B 1-Spd
268B 1-Spd
268B 1-Spd
268B 1-Spd
268B 1-Spd
268B 1-Spd
Contact Us
- China Caterpillar Hydraulic Final Drive Motor Supplier
- Address9582 Nevy Street, St-Aurent, Gebec, D2R 4F2, Canada
- Phone(Working Time)+1-288-251-6381
- Fax
Caterpillar 268B 1-Spd Technical Articles
| How do you calculate the power of a hydraulic pump? |
| How many GPH is a 1 hp pump? |
| What is a 2 stage hydraulic pump? |
Caterpillar Hydraulic Final Drive Motor CATEGORIES
- Caterpillar Hydraulic Final Drive Motor
- John Deere Hydraulic Finaldrive Motor
- Bobcat Final Drive And Travel Motor
- Kato Hyaraulic Final Drive Motor
- Sany Hydraulic Final Drive Motor
- Vermeer Hydraulic Final Drive Motor
- JCB Hiflow Hydraulic Final Drive Motor
- Ditch Witch Hydraulic Final Drive Motor
- JCB Low Emission Hydraulic Final Drive Motor
- Kobelco Dozer Travel Motor
- John Deere Hydraulic Final Drive Motor
- Daewoo Hydraulic Final Drive Motor
- Bomag Hydraulic Final Drive Motor
- Schaeff Hydraulic Final Drive Motor
- Kawasaki Hydraulic Pump
- Yuchai Hydraulic Final Drive Motor
- Bobcat Hydraulic Final Drive Motor
- JCB Flow Hydraulic Final Drive Motor
- JCB Tier 3 Hydraulic Final Drive Motor
- Large Slewing Bearings
- Slewing Ring Bearings
- Kaydon Slewing Bearing
- Bearing Slewing Ring
- Super Precision Bearings
- Super Precision Angular Contact Bearings
- Super Precision Bearing
- Slewing Ring
- Cross tapered roller bearing
- Four-Row Cylindrical Roller Bearing
- Spherical Roller Bearings
- Angular Contact Ball Bearings
- Double Row Tapered Thrust Roller Bearings
- Railway Rolling Spherical Roller Bearings
 Caterpillar 267B Reman Hydraulic Final Drive Motor
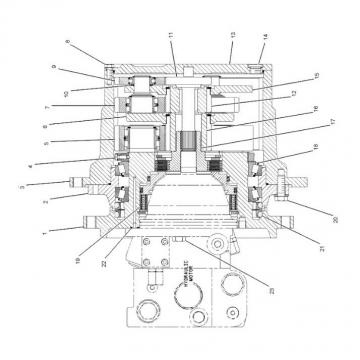 Caterpillar 267-6913 Hydraulic Final Drive Motor
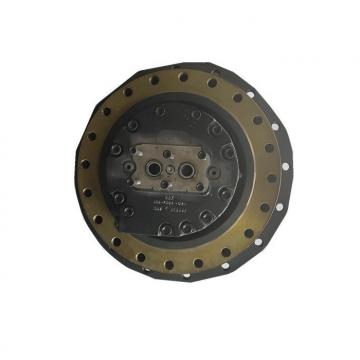 Caterpillar 267-6877 Hydraulic Final Drive Motor
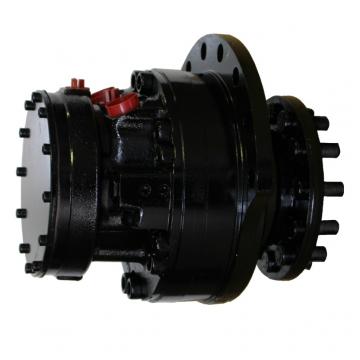 Caterpillar 267-6861 Hydraulic Final Drive Motor